Create a zoning
There are several ways to create a zoning depending on the intended purpose when creating the route plan:
Isodistance or isochrone zones
To access zoning creation, open the “Plans” menu. Then click on “Zonings”.
The following page will open
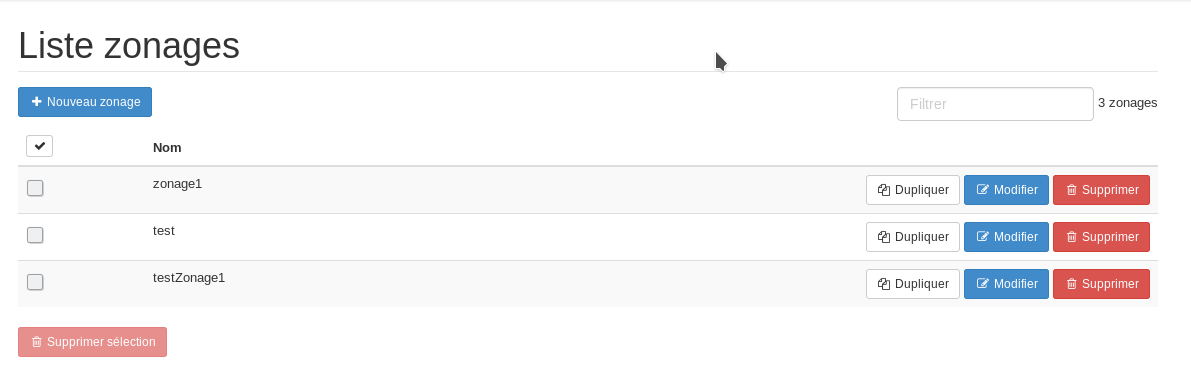
Click on the New zoning button .
On the zoning creation page, enter the Name of the zoning and an optional reference
Choose the Plan to assign the zoning to by opening the “Destinations from a plan” menu. You can select part of the destinations to display if one of the created Plans contains a label filtering the destinations to display (see the Labels section).
Save by clicking on the Create zoning button .
The map will be displayed centred on the depot if there is only one depot, or showing all depots if there are several (see the depot section)
Automatic zonings
The right-hand panel allows you to:
- Display or hide all destinations.
Generate automatic zonings using the options in the “Generate” dropdown button.
- Export a zoning to a spreadsheet.
Automatic zonings can be generated based on:
- Numerical criteria: A number of zones, stops, kilometres or deliverable units, depending on your needs and strategies.
- A distance from the depot: the zoning boundaries are drawn at equal distance from the depot according to the number of km entered.
- A journey time from the depot: the zoning boundaries are drawn as isochrones from the depot according to a set time.
Note:
For generating an isochrone zoning, the itinerary calculator must be set to Fastest. For generating an isodistance zoning, the itinerary calculator must be set to Shortest.
Note:
To create a zoning using this method, the vehicle configuration must include depots.
Zones by criteria
Zones are drawn according to the criteria defined in the Automatic Zoning modal.
The criteria to be entered:
The desired number of zones
If the strategy is simple, the number of stops is divided by the desired number of zones.
If the strategy is advanced, the zones are balanced according to the working time divided by the desired number of zones, the number of deliverable units divided by the desired number of zones, the number of kilometres to be covered divided by the desired number of zones, or the number of visits divided by the desired number of zones.
The distance calculation can be as the crow flies or by road (itinerary calculation).
Isodistance or isochrone zones
Zones can be drawn from each depot in a plan. When you click the Generate button, the isodistance or isochrone modal window opens.
Enter the distance or time around the point to be drawn. The zone will be drawn.
Zones can be drawn from any point on a plan (planned or unplanned). When you click on the point, the point’s context window opens.
The magic wand icon lets you draw an isochrone or isodistance zoning around the point, depending on the itinerary calculator.
Enter the distance or time around the point to be drawn. The zone will be drawn.
Manual zonings
Click on the icon to activate the zone editor.
Draw the zone directly on the map by clicking and dragging your mouse. Close the zone by clicking on the first point. Your zone is now drawn.
Assigning zonings
A free text field appears for each zone created so you can give it a name (optional).
A vehicle can be assigned to your zone via the dropdown list in the right-hand menu. The number of zones can match the number of vehicles.
Click on the “Save Zonings” button .