Authentication
The user can make it easier to access their Mapo Driver account by:
- entering their email address and password,
- ticking the "Stay signed in" box.
For up to 3 days, if the user wants to access the Mapo Driver app, a single click will be enough to log in automatically, without having to enter their email and password again, provided they ticked the "Stay signed in" box. In addition, there will be help with filling in their email and password to save them from having to type out their full address and password.
However, if the user does not tick this box, they will not be automatically signed in the next day, and will need to manually enter their email and password to access their account.
Mapo Driver Evaluation
To get feedback from users of the mobile app, and to better address issues and improve the user experience, we display a rating popup:
- after the first route is completed, i.e. at the final status of the last mission of the route,
- if the user does not respond, the popup will be shown again 3 months later.
Activating Geolocation
When downloading or updating the mobile app, the user will see a step-by-step guide to help them activate geolocation.
The activation or deactivation of geolocation details can be viewed and managed from the settings in the menu.
This guide is triggered when the user logs in, and the settings will affect the following features:
- tracking the user in the Mapo Planner dashboard,
- location reporting at the user's request.
Configuring Mapo Driver Usage Blocking
1. Purpose
Prevent any use of the app unless geolocation is activated in:
"Always allowed" mode on Android
"Always" mode on iOS
Main goal:
Ensure reliable tracking of missions and prevent any data loss.
2. Context
The proper functioning of Mapo Driver relies on:
Continuous position reporting
Real-time tracking of routes
Consistency of geolocated statuses
Integrity of data sent to back-office tools
Without active geolocation:
Tracking is degraded or non-existent
ETAs are inaccurate
Geofencing does not work
Proof of visit may be invalidated
Back-office tracking becomes inaccurate
3. Activation
This feature is controlled via a Feature Flag at the account level.
If the flag is activated:
Blocking becomes mandatory for all drivers linked to the account.
If the flag is not activated:
No automatic blocking.
4. Main rule
As long as geolocation is not:
Activated
In "Always allowed" mode
The app is blocked.
No business screens are accessible.
5. User behaviour
5.1 Blocking
When the app is opened, if geolocation is:
Deactivated
Activated only "While using the app"
Denied
Limited
Then:
The user is redirected to a dedicated blocking screen.
No access to missions.
No access to features.
5.2 Blocking screen
The screen:
Explains why geolocation is required.
Clearly states the required mode ("Always allowed").
Provides a direct link to system settings.
6. Automatic unblocking
If the user:
Opens the system settings
Activates geolocation in "Always" mode
Then:
The app detects the change.
The block is automatically removed.
The user returns to the initial screen.
No restart required.
Settings
The settings can be accessed from the menu at the top left.
Here, you can configure different service states for how our mobile app works.
.
.
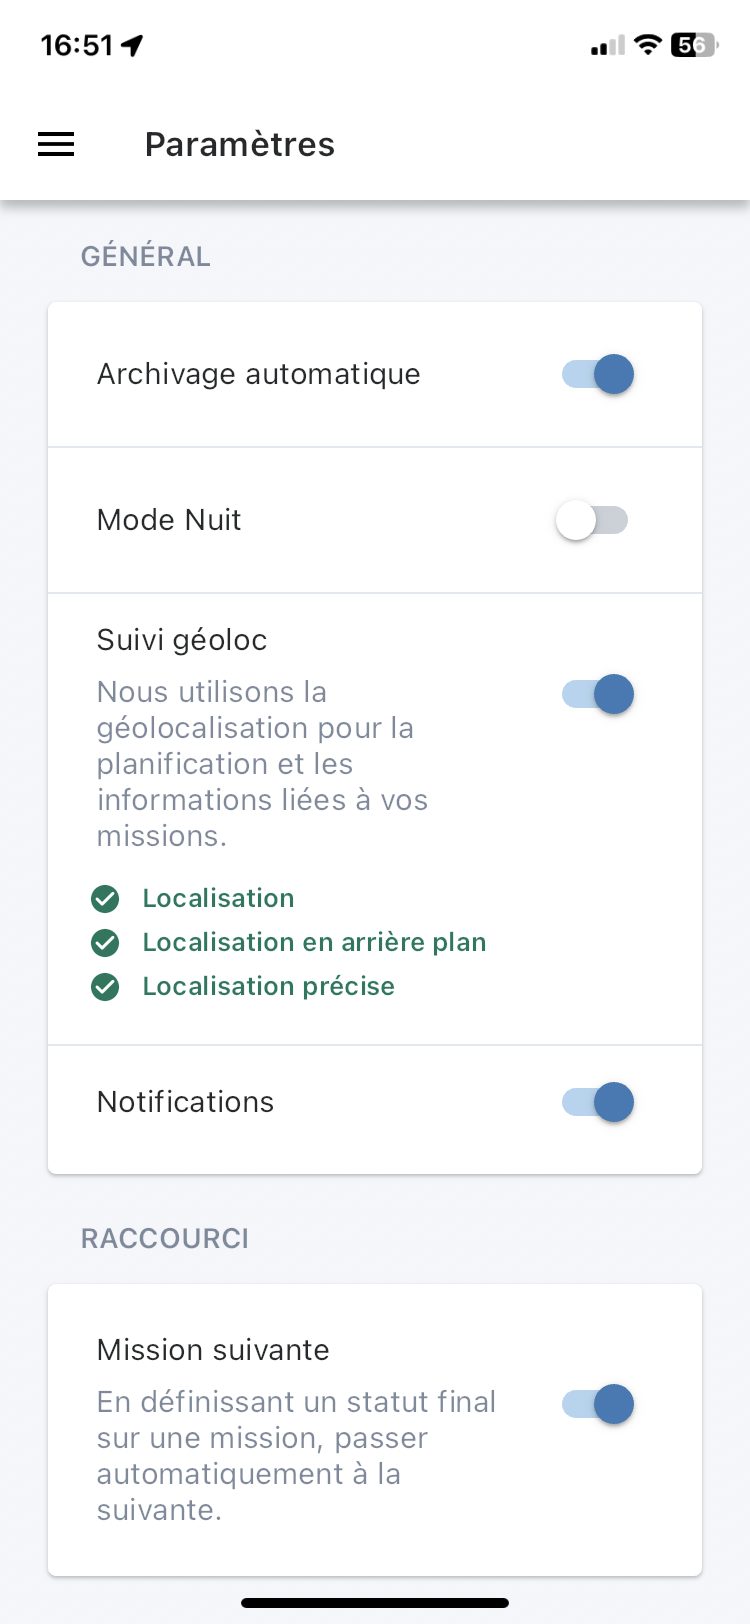
Use the toggle to activate or deactivate each setting:
- automatic archiving: when the status of the last mission of the route changes to "Completed", we automatically archive the route,
- night mode: you can save your device's battery and see more easily in low light,
- geolocation: this is used to allow the planner to track the progress of the route from the public portal, and for the driver to report their position.
- next mission: when a mission is completed, we automatically switch the driver to the next mission.
- navigation app: this setting lets you choose the default GPS.
- text size: the user can adjust the zoom and font size in Mapo Driver to suit their eyesight and make reading easier.
By scrolling down the page, you'll find the "About" section where you can access:
- our privacy policy,
- our legal notice, and
- our terms of use.
Offline mode
If there are connection or synchronisation issues with the mobile app, due to "dead zones" or the performance of the phone used, a message will appear to let you know whether the mobile app is connected or not. When the connection is restored, a new message will confirm that synchronisation has been re-established.
When the app is offline, meaning there is no connection or it can't be synced with a planning tool, the mobile app still works!
No information will be sent to the route planning tool, but the user can still carry out their routes.
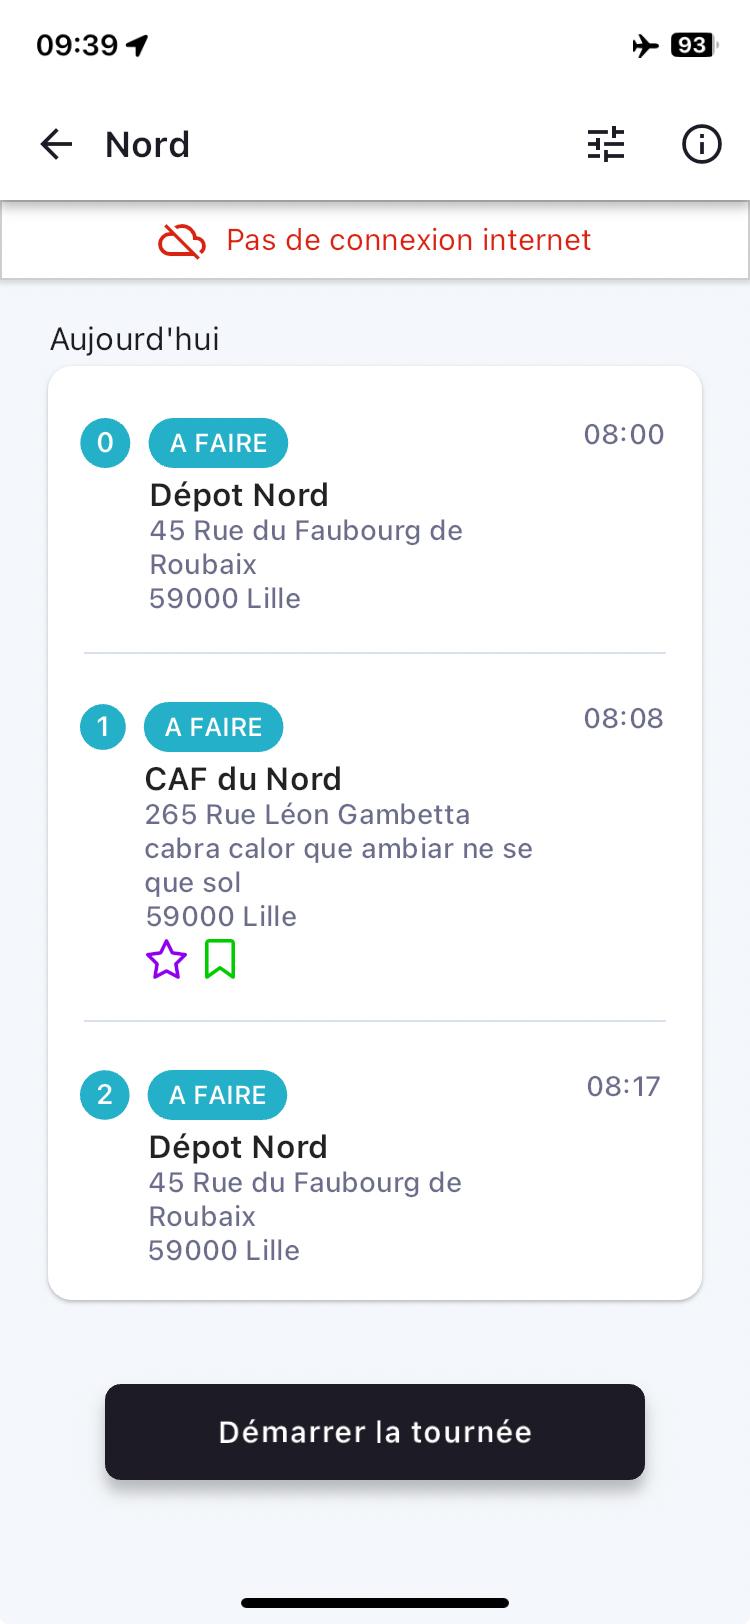
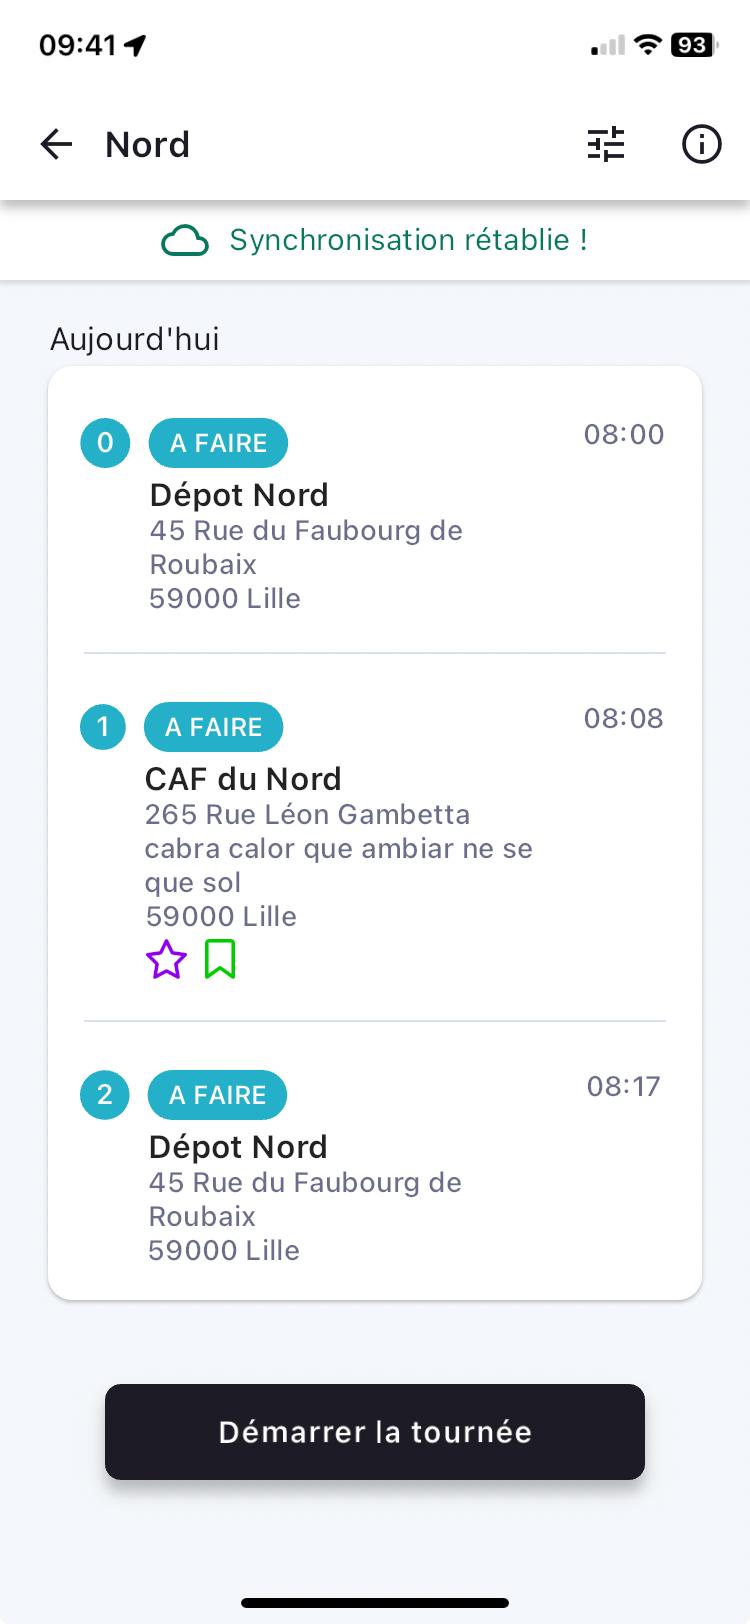
The information resulting from the user's actions in the mobile app will be stored until the next connection to a network and to the carrier's planning tool.
When the connection is restored, a new message will be displayed confirming that synchronisation has been re-established.
Route List
Once logged in, by default, you land on the page showing your active routes. You can view both your active and archived routes on the same page.
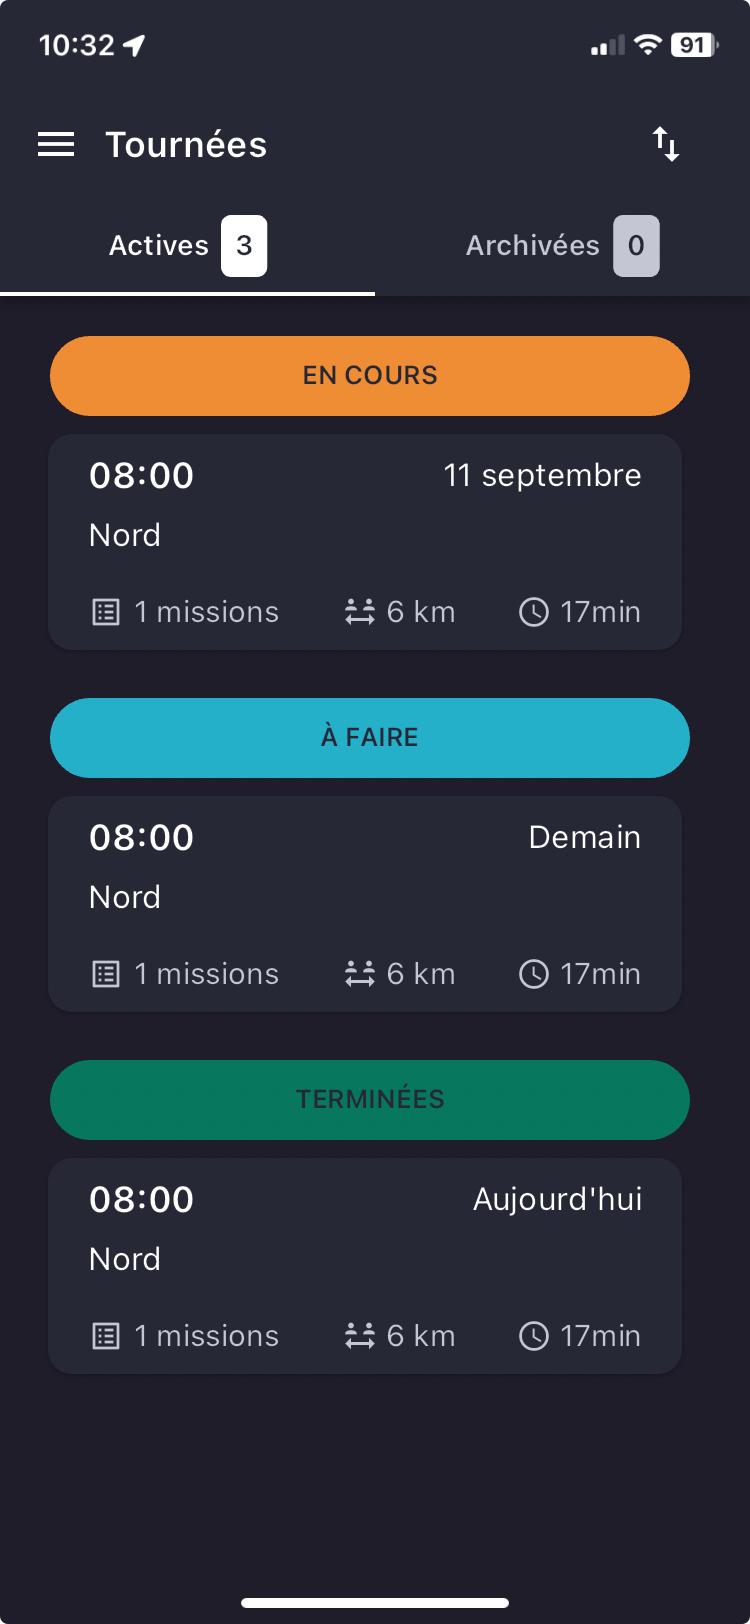
Active
You can see all your active routes and their respective information on a single screen!
You’ll find:
- the status of the route,
- the route date,
- the planned start time of the route,
- the name of the route,
- the number of missions in the route,
- the total theoretical distance of the route,
- and the total theoretical time for the route.
Tap on a route to access the missions and their attached details.
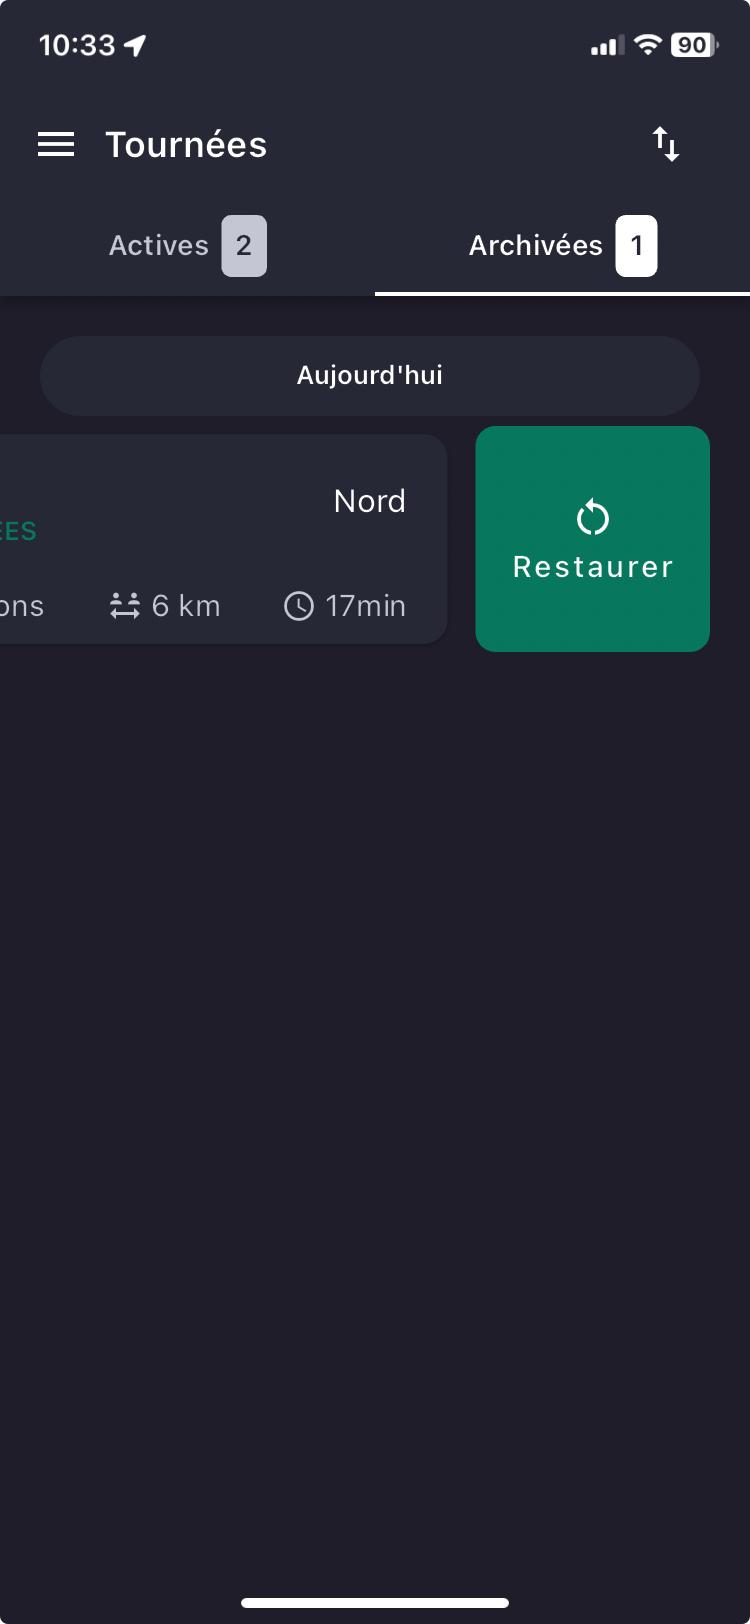
Archived
You can view the list of all routes that have been completed.
The missions and details of archived routes cannot be viewed. To do so, you must restore the route to access its details.
Your archived routes are kept for 15 days in the mobile app. After this period, they will be deleted from the mobile app.
On request, the Mapo Driver team can set up for you:
- automatic deletion of archived routes in the app after 24 hours. This solution has been added to avoid drivers being overloaded with outdated information,
- automatic archiving of a route when it is completed (indicated by a final status)
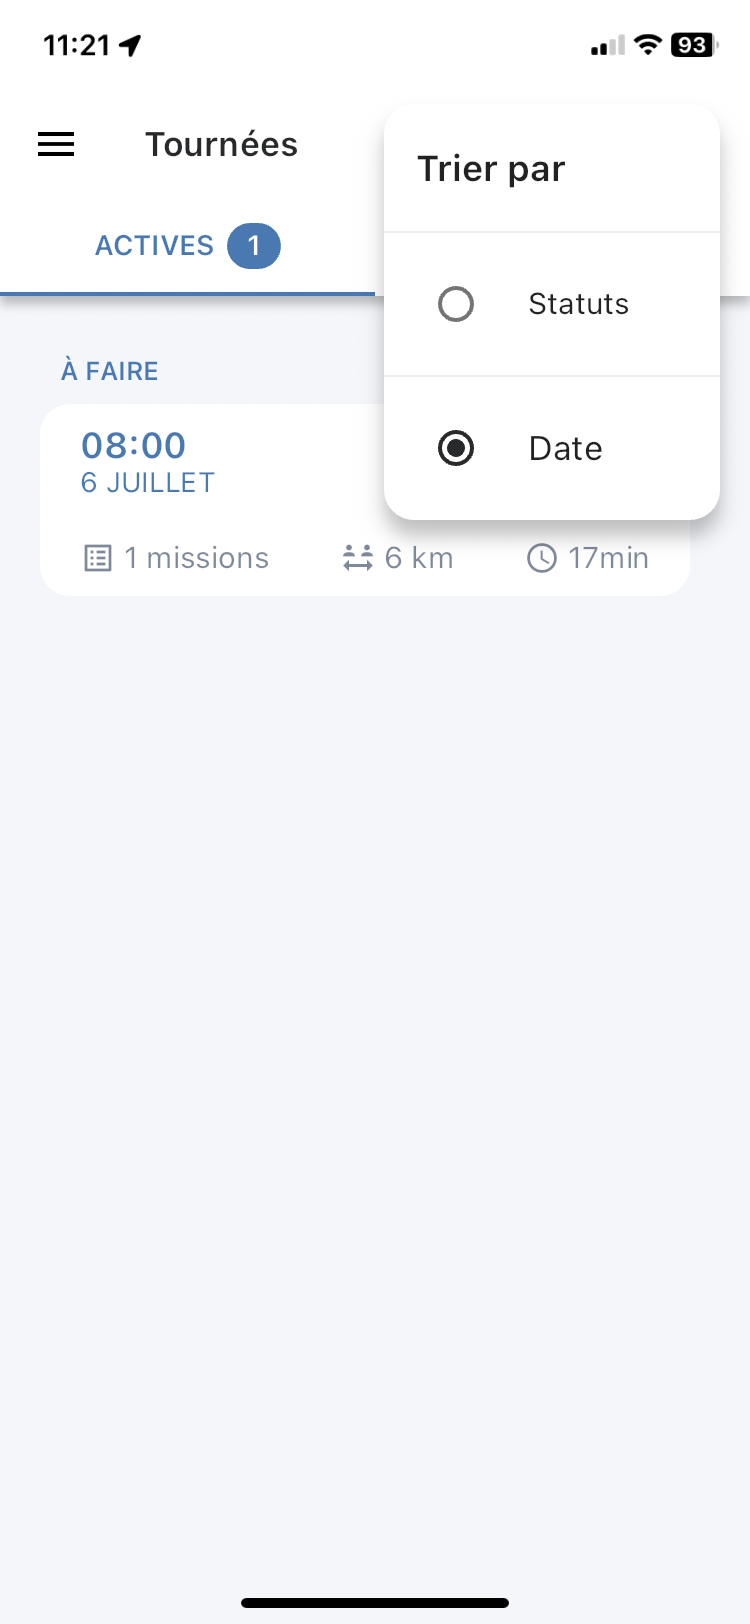
Sorting routes
From the route list, you can click on the filter to sort your routes either by status or by date.
When sorting by status is selected, routes are ordered as below by increasing date and time:
- In progress
- To do
- Completed
When sorting by date is selected, routes are ordered as follows:
- Sorted and displayed in ascending order, from the earliest date to the furthest in the future
- They are ordered from the earliest time to the latest
 .
. 
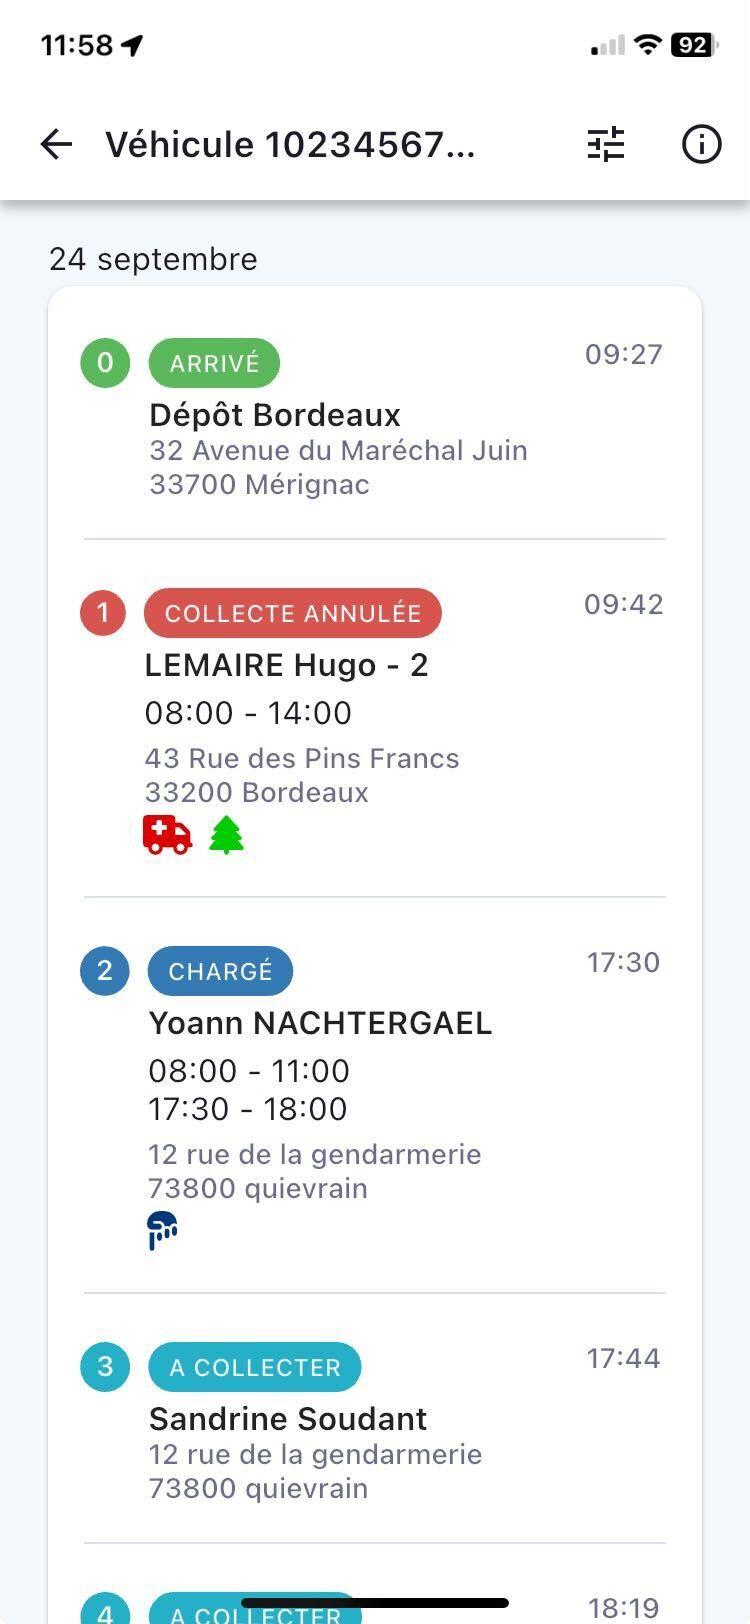
Mission List
You can view all your missions on the same page.
Just like on the route page, you’ll be able to see all the details of your missions!
You’ll find:
- the name of the route (e.g. "South-West"),
- the date your missions are scheduled for,
- theoretical arrival times at destination,
- the statuses of your different missions,
- the name of each mission,
- their respective addresses
- as well as the delivery slots if these are provided.
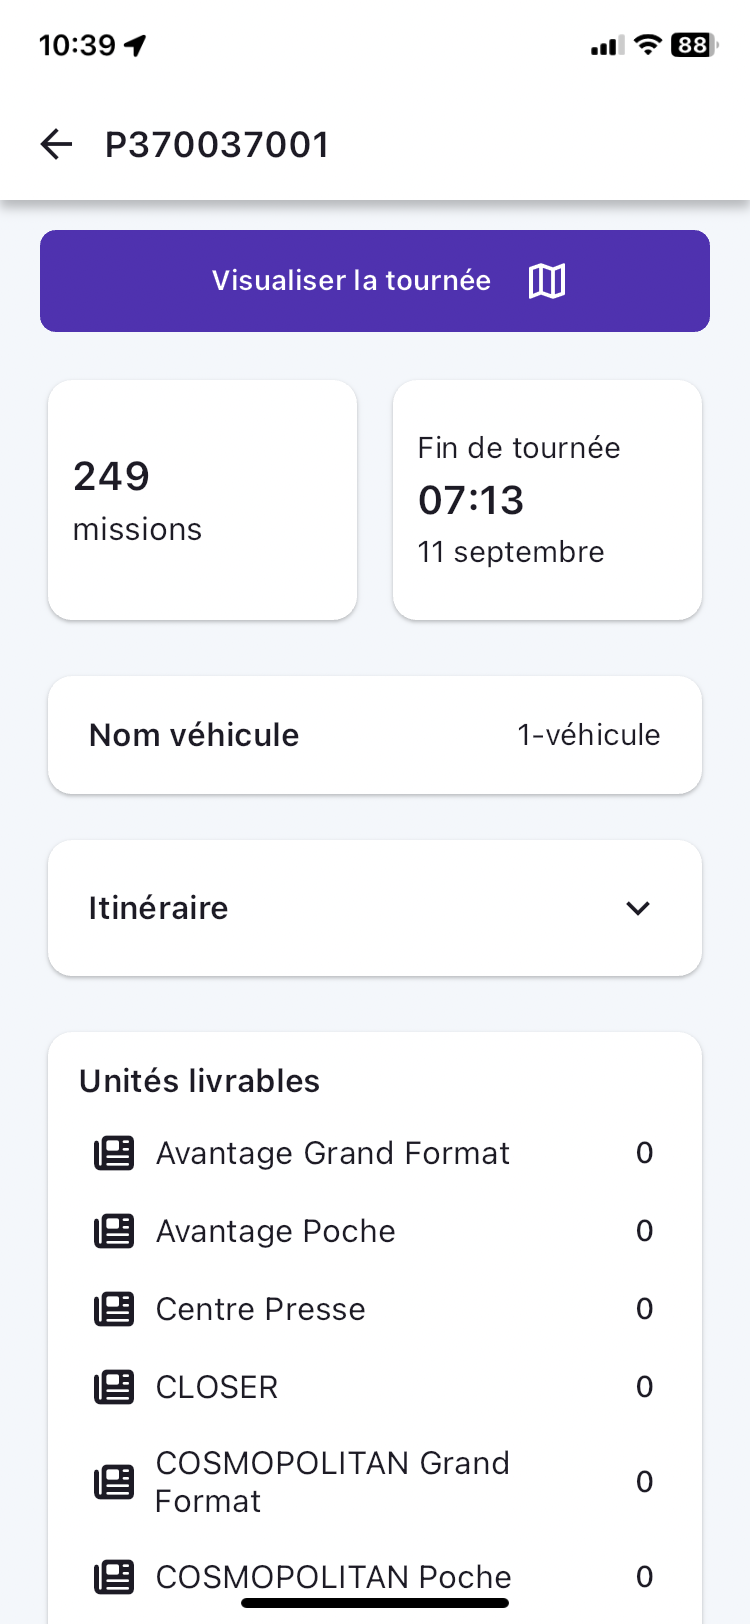
Route Summary
To help you anticipate and prepare your routes, the route summary shows the key information for:
- number of missions in a route,
- the list of towns where deliveries are scheduled,
- the end date of the route,
- and the end time of the route.
This information is displayed in a pop-in:
- from the screen listing the missions of an assigned route,
- and on the user's first click on an assigned route.
At the top of the route summary page, there is a button which, when clicked, displays a map background:
- the delivery points for the missions that make up the route,
- the numbering of missions in the chronological order of planning,
- cluster management of points when zooming in and out,
- from a map background with international coverage,
- with both dark and light modes,
- and handling cases where there is no connection or network
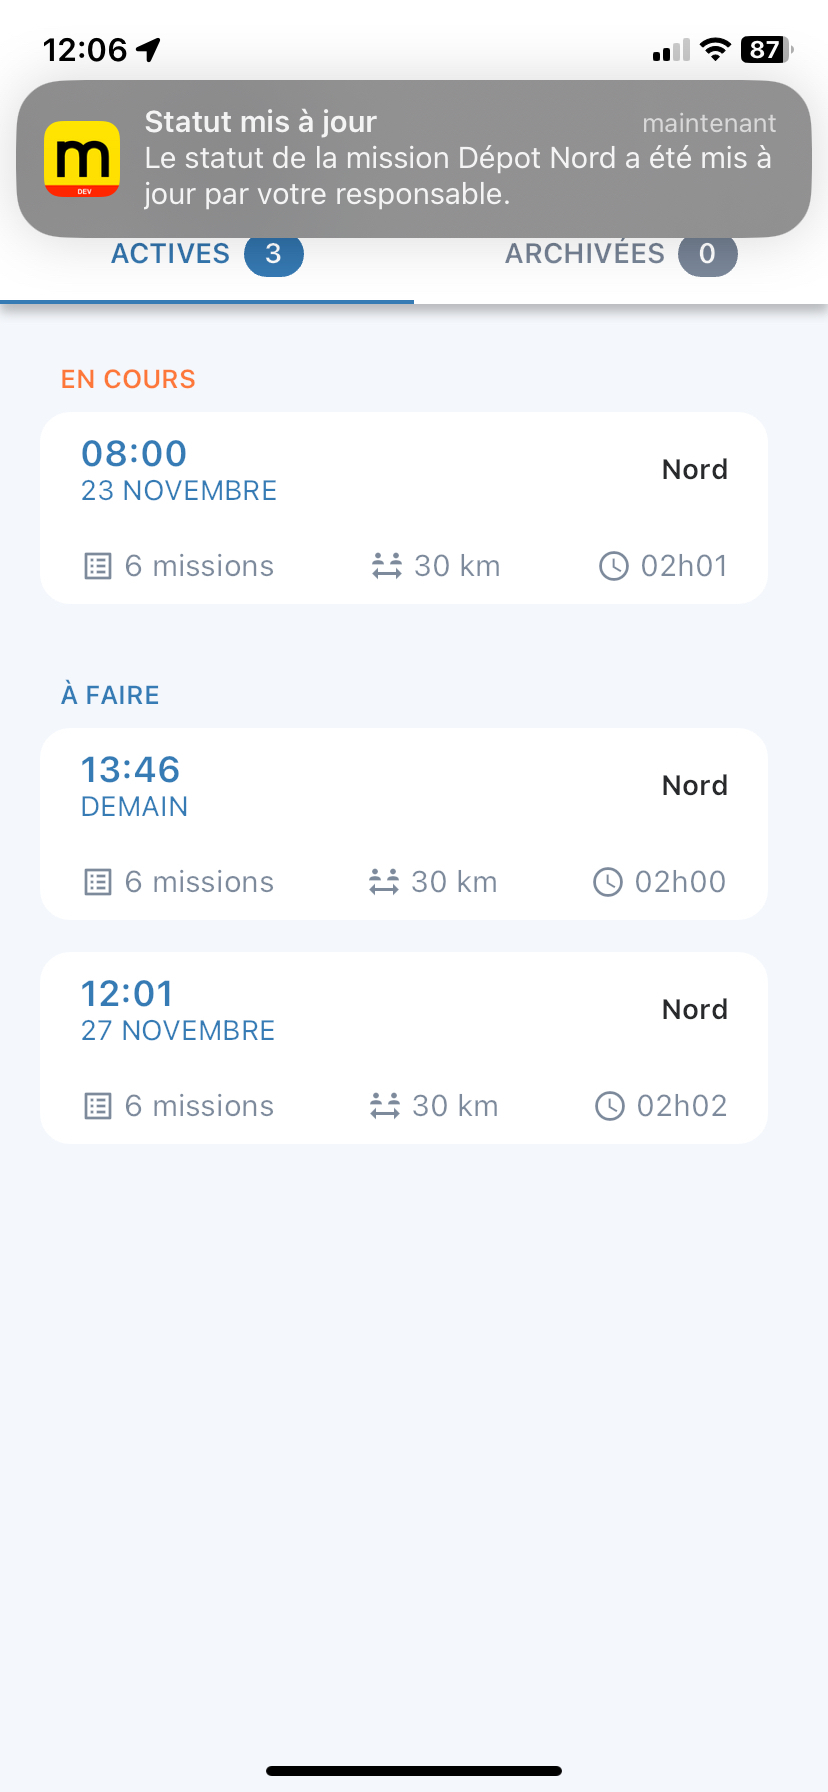
Notifications
Route
If the user has agreed to receive notifications in the mobile app, they can receive two types of notifications:
- route changes,
- and mission status changes.
Drivers are notified whenever their manager makes a change to any element of their route:
- mission,
- labels,
- times,
- names,
- deliverable units, etc.
These notifications are received by the mobile app when it is open. Otherwise, the user will see a "push" notification, or can view them from the "Notifications" menu.
For any mission status update by the planner, the driver will be notified. They will no longer be able to change the status afterwards.
Be aware of the mode used on your smartphone, as it may mute notifications from the mobile app.
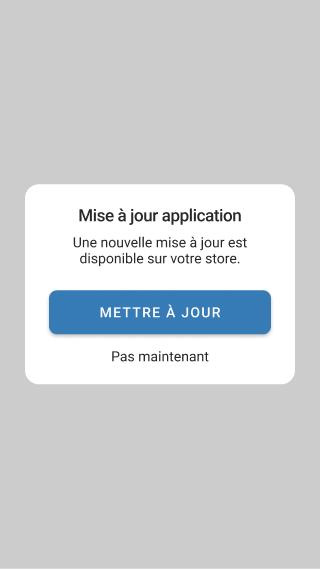
Mapo Driver Version
If the user logs into the mobile app and it detects that the version being used is not up to date compared to the one available on the iOS and Google Play stores, a pop-in will appear prompting the user to update or to do so later.
This notification pop-in will be shown once a day until the user updates their app.
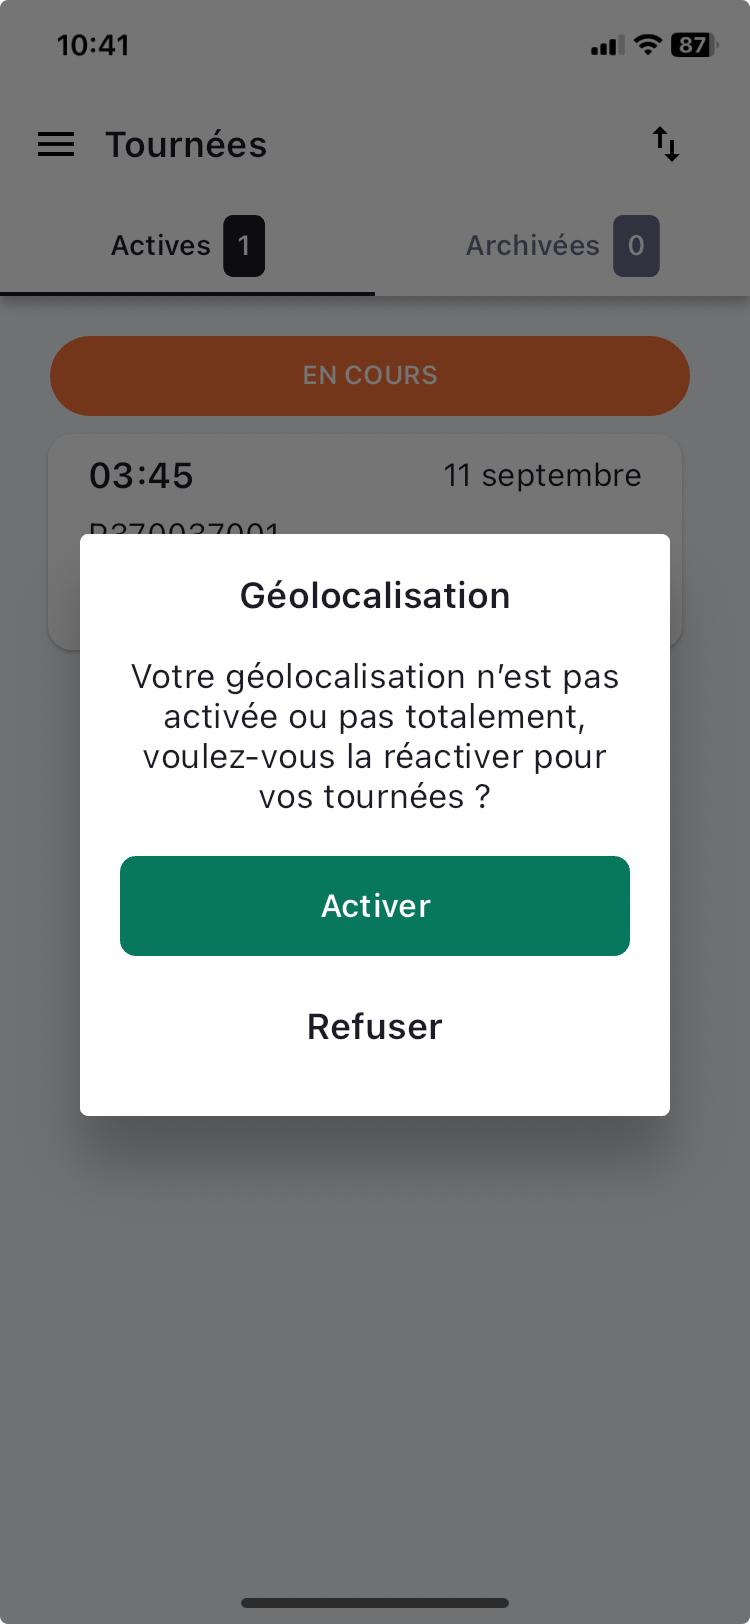
Geolocation
When the user logs in, if my permissions and authorisations related to geolocation are disabled, a pop-in appears to alert the user.
On login, a check is carried out to identify:
- if location access is enabled in the phone settings,
- if permission to access location is enabled for the Mapo Driver app,
- and if precise location permission is enabled for the Mapo Driver app
The pop-in appears once a day as long as geolocation is not fully enabled.
Mission Mapping
The Mapo Driver mapping, which displays the missions of a route, uses Open Street Map (Open Source contributor).
The map can be accessed from the route summary (information button shown as an "i") from the mission list screen, as well as from the mission detail screen.
The map shows all the points (markers) of a route. Each marker is linked to a mission status and updates according to the driver's actions.
You can also see a route (polyline) between each of these points. By tapping on one of them, the driver can view:
- the status,
- the client's name,
- the mission's postal address,
- you can tap on "Mission Detail" to switch back to the mission detail page,
- and view the units and quantities transported on the mission.
By tapping on "Mission Detail", the user will be redirected to the mission detail. This allows you to easily switch between the map and mission details.
Any changes made to an ongoing route by the manager will trigger an update of the map.
Finally, the lorry marker represents the driver who has enabled geolocation in Mapo Driver. This marker follows the driver while the map remains open. This display is designed to help the driver better understand, based on their position, which missions they need to complete.
.
Displaying roads prohibited to HGVs (Heavy Goods Vehicles)
1. Context
Several issues have been raised regarding the use of heavy goods vehicles:
Roads prohibited to HGVs are not always visible.
Restrictions can vary depending on the area.
-
Route errors can lead to:
Fines
Delays
Complex manoeuvres
Safety risks
The standard app is not sufficient in these specific contexts.
2. Enabling the feature
The feature is:
Can be activated at account level
Available only for customers using HGVs.
If the setting is activated:
Drivers on this account have access to it.
It is not visible to others.
3. General operation
Once activated, the driver can:
View the route of their round.
Display roads prohibited to HGVs within a defined radius.
4. Driver interface
On the route map:
The route of the missions is visible.
A button (CTA) allows you to activate the display of HGV restrictions.
When the CTA is activated:
Roads prohibited to HGVs are shown visually.
They are marked with red dashed lines
The driver can:
Activate the display
Deactivate the display
This is not enabled by default, but available on demand.
5. Display radius
Prohibited roads are displayed:
Within a certain radius around the route.
This allows:
The map not to be overloaded.
To stay focused on the operational area.
6. Data source
Routes prohibited to HGVs are retrieved via: OSRM (Open Source Routing Machine).
OSRM is an open source routing engine that allows:
Route calculation
Integration of map data
Consideration of specific constraints
HGV restrictions therefore come from map data integrated into OSRM.
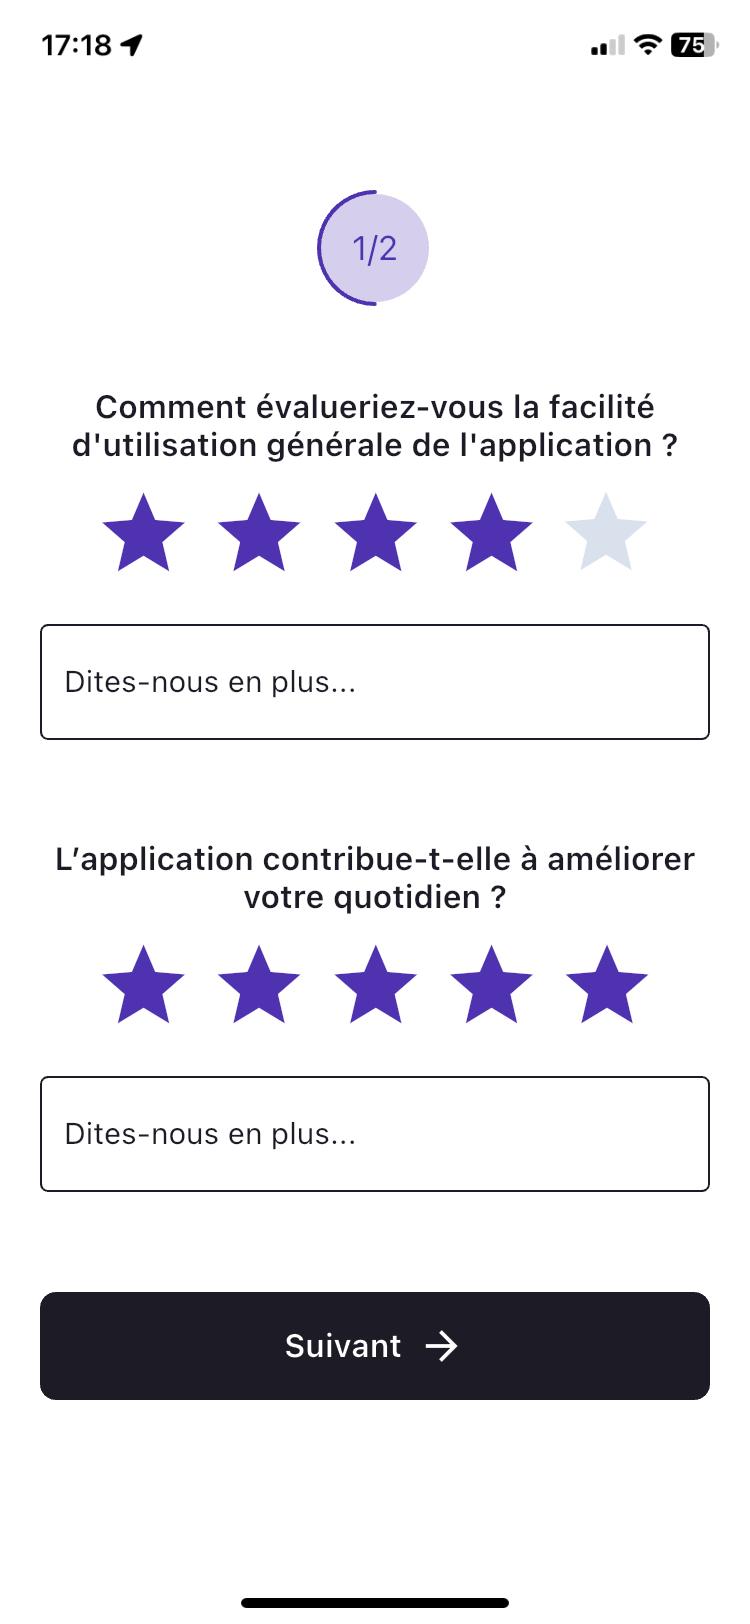
Survey
Mapo Driver ensures its use is always as well suited as possible to drivers’ daily needs.
This is why, almost every quarter, we present questions to gather and analyse feedback, and to continually improve the mobile app.
Accessible from the mobile app menu under "Give your feedback", this survey consists of short questions with a star rating system. In addition, there is the option to leave a comment to supplement the rating given.
A red dot appears in the menu as long as the user has not answered the questions. Once answered, the dot will disappear until the next questionnaire is released.